Usenet is packed full of content including illustrative novels. Thanks to developer evilhero you can now automate these downloads. You can create a wishlist of all the comic books you want and mylar will search your usenet indexers for the media files and send them to your usenet downloader much like NzbDrone does for periodic video files and CouchPotato for lengthy video files.
Mylar will also search some private torrent sites and send the .torrent files to your downloader's watch directory. Remember Mylar is in Alpha so there may be bugs. Report any bugs you may have in the Mylar forum or its github so Mylar can be improved. This guide was tested on Windows but should work on any platform like Ubuntu, Debian, Linux, Raspberry Pi, Mac OSX, Synology. This guide assumes you have Mylar installed and a working configuration of NZBGet or Sabnzbd. You of course need a usenet provider like UsenetServer as well.
| Usenet Provider | |||||||
|---|---|---|---|---|---|---|---|
| UsenetServer | |||||||
| Newshosting | |||||||
| Frugal | |||||||
| Usenetlink |
Configure Mylar with Sabnzbd or NZBGet
You need a Comic Vine account to get an API Key so Mylar can find you good comic results
After you've signed up go to http://www.comicvine.com/api/
You will then get taken to a screen that shows your API key. Copy it somewhere or leave the tab open. You will need this later.
We are going to configure downloaders first before setting up Mylar. Here are mini guides for Sabnzbd and NZBGet, choose your main usenet downloading program.
You may need to get Python 2.7 installed no matter which operating system you are on.
Configure Downloaders
Please see Matt's comment for an update.
Configure Sabnzbd with Mylar
Use Windows Explorer to browse to C:\Mylar\post-processing
Rename this file autoProcessComics.cfg.sample to autoProcessComics.cfg
Now copy both autoProcessComics.cfg and autoProcessComics.py into C:\Mylar\post-processing\sabnzbd
You should now have three files in C:\Mylar\post-processing\sabnzbd
- autoProcessComics.cfg
- autoProcessComics.py
- ComicRN.py
Copy all these files to your Sabnzbd script folder.
If you don't have a script folder you can create one
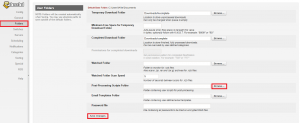
Now specify the scripts folder in Sabnzbd. Go to http://ip.address:8080/config/folders
Browse to your scripts directory and click Save Changes.
Create a Comics Category for Sabnzbd.
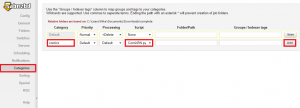
Go to http://ip.address:8080/config/categories on your Sabnzbd box
Add comics (case sensitive) and choose ComicRN.py as the Script. Click Add
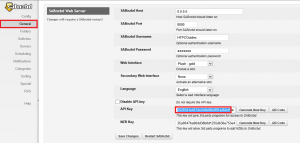
The last information we need from Sabnzbd is its API key.
Go to http://ip.address:8080/config/general/ and copy the Full API key somewhere safe, try to separate it from the Comic Vines API key.
Configure NZBGet with Mylar
Use Windows Explorer to browse to C:\Mylar\post-processing\
Rename this file autoProcessComics.cfg.sample to autoProcessComics.cfg
Copy autoProcessComics.cfg to C:\Mylar\post-processing\nzbget
Copy these files autoProcessComics.cfg, autoProcessComics.py and ComicRN.py into your NZBGet script folder.
The default NZBGet script folder is \NZBGet\scripts
You should now have these files in your scripts folder
- autoProcessComics.py
- ComicRN.py
- autoProcessComics.cfg
If you already had NZBGet open you will need to restart it (not just refresh it in browser) so it can detect the new scripts.
Now we're going to choose the scripts and configure the comics category to use the script.
Open up the NZBGet interface default is http://ip.address:6789 user: nzbget password: tegbzn6789
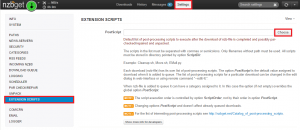
Click Settings and then Extension Scripts. Click Choose
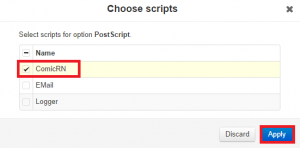
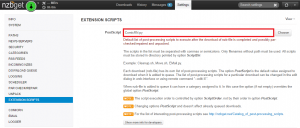
You should see the ComicRN script in the list, check it and click Apply
It will now show ComicRN.py in your list
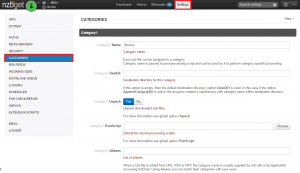
Now it's time to connect it to a comics category. Click Categories on the left.
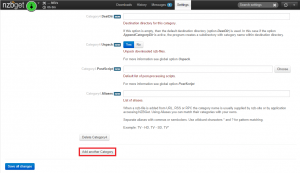
Scroll down until you see the Add new Category button
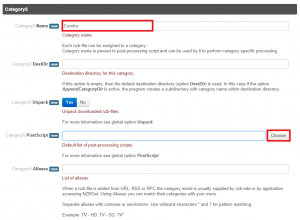
Now give it the name comics and click Choose to select the script
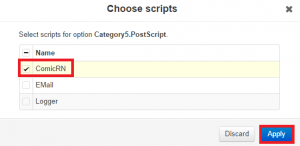
Select ComicRN.py and click Apply
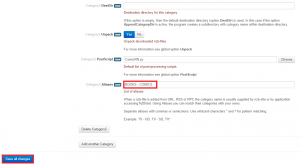
It will now show the script is enabled for the comics category.
Add Books – Comics to the Aliases box in case you are remote pushing from your indexer
Scroll down and click Save All Changes
You will get a screen to reload NZBGet, click Reload.
Configure Mylar for Usenet Comics
Open up the Mylar web interface http://ip.address:8090
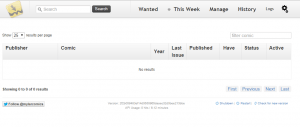
You will see this home screen
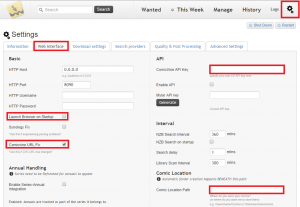
Now click Settings in the top right and then the Web Interface tab
Uncheck Launch on Startup unless you want the browser to load each time you boot.
Paste your Comic Vine API key in Comic Vine API Key
Check Comic Vine URL Fix
Add a path for your comics to be downloaded in the Comics Location box. This is where they will be nicely named and organized by the Mylar post processing script.
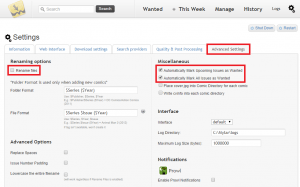
If you want Mylar to automatically search for back issues of the comics you add click Advanced Settings.
You can test the renamer by checking Enable Renamer, leave them as default or rearrange them to your liking.
Check Automatically Mark All Issues as Wanted
Automatically Mark Upcoming Issues as Wanted should already be checked.
If you scroll down you will be able to add Pushbullet notifications and other notification services, just paste your relevant API key.
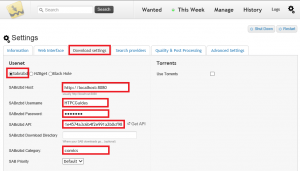
Configure the downloaders. Click the Download settings tab.
Click the radio button for your downloader.
For Sabnzbd, click the Sabnzbd radio button.
Enter your Sabnzbd address, localhost should work if it is on the same machine as Mylar.
Enter your username and password to log in to Sabnzbd. Paste your Sabnzbd API key you got in the earlier step.
Enter the category you created earlier, to avoid issues make sure it matches the same case as in Sabnzbd. I used comics in Sabnzbd so I input comics not Comics here in Mylar.
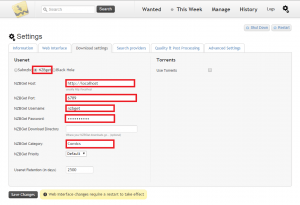
For NZBGet enter the URL, if it is on the same machine http://localhost should work.
Enter the port NZBGet listens on, 6789 is the default.
Enter the username and password to access NZBGet, default is nzbget and tegbzn6789
Enter the category you created in NZBGet earlier and match the case. I used Comics (not comics) so I am using Comics here in Mylar.
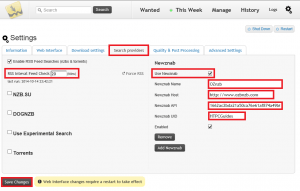
Go to Search Providers tab. Enter your RSS sync interval, anything under 15 minutes can get you in trouble with your indexer.
If you have DOGnzb.cr or NZB.su, check the box and input your username and API key.
If you have another newznab compatible indexer like OZnzb, PFmonkey, check Use Newznab.
Give it a name, enter the URL, paste your indexer API key and enter your Username.
Click Save Changes.
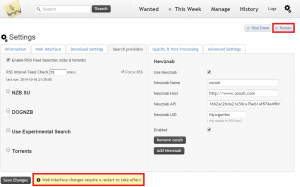
You can see it requires you to restart Mylar for the settings to take effect.
Click Restart in the top right corner.
Add Content to Mylar
I am using Kid Eternity 1947 which is under the Public Domain as a demonstration
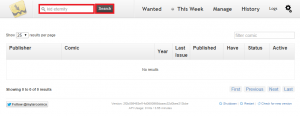
Click in the search box and enter your comic. Click Search
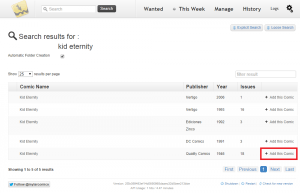
Thanks to the API it will search the huge Comic Vine database. These are the results. Click Add this comic.
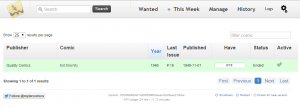
Now you can see the comic is added and Mylar will regularly search for any missing issues.
Note: If you have added a comic book and it doesn't show up, try refreshing the page.
Mylar will now search for back issues if you enabled Automatically Mark All Issues as Wanted and push them to your downloader, rename them and organize them.
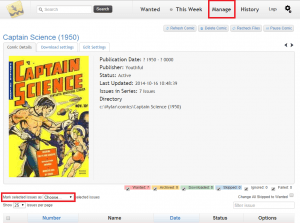
The Manage screen looks quite cool, this is another public domain comic Captain Science who sounds like a serious badass.
You can play in the Manage area to individually mark different comics or issues as wanted or ignored.
Let Mylar run in the background and do its thing, you will see your downloads be successfully processed.
In Sabnzbd it will look like this
In NZBGet it will look like this

Create your wishlist and happy reading. If anything was unclear or if a specific feature or option needs clarifying please let me know in the comments and I will research it. This guide got the basic setup working and should be enough for most people's needs.
You may be interested in ComicStreamer (Windows, Linux coming soon) for creating a comic server.


