NZBGet is a lightweight usenet downloader. NZBGet and the Raspberry Pi are like a match made in heaven. The Raspberry Pi is a weak yet capable little machine and NZBGet runs well on low spec hardware. This will be in my upcoming Ultimate Raspberry Pi Usenet Guide. I recommend a UsenetServer account for downloading from usenet. I tested this guide 3 times on a fresh Raspbian image from September 2014.
There is an updated version of this guide
If you are trying to figure out which hardware would work best for you, consider reading the Pi benchmarks.
| Pi Unit | ||||||||
|---|---|---|---|---|---|---|---|---|
| Raspberry Pi 3 | Quad Core | |||||||
| Raspberry Pi 2 | Quad Core | |||||||
| Raspberry Pi | Single Core | |||||||
| Banana Pi | Dual Core | |||||||
| Banana Pi Pro | Dual Core |
Install NZBGet Raspberry Pi
Update and upgrade
sudo apt-get update
sudo apt-get upgrade -y
Install the Correct Unrar version
This fixes Error Unrar 10
echo "deb-src http://mirrordirector.raspbian.org/raspbian/ wheezy main contrib non-free rpi" | sudo tee -a /etc/apt/sources.list

sudo apt-get update -y
sudo apt-get build-dep unrar-nonfree -y
sudo apt-get source -b unrar-nonfree -y
sudo dpkg -i unrar*.deb
It also solves Unrar error 64 as long as you are using absolute paths in NZBGet
Install dependencies
sudo apt-get install build-essential libsigc++-dev sigc++ libncurses5-dev libssl-dev libxml2-dev libpar2-0-dev unzip p7zip-full -yDownload the NZBGet 13 source
wget http://sourceforge.net/projects/nzbget/files/nzbget-stable/13.0/nzbget-13.0.tar.gzUnpack the source and enter the folder it creates
sudo tar -xvf nzbget-13.0.tar.gz && cd nzbget-13.0Grab updated libpar2 which nzbget needs to par check rar files
Note: This fixes the ‘nzbget: error while loading shared libraries: libpar2.so.1: cannot open shared object file: No such file or directory’. Run apt-get install libpar2-dev first and then run the following which will solve the problem so you can compile NZBGet without errors.
wget –no-check-certificate https://launchpad.net/libpar2/trunk/0.4/+download/libpar2-0.4.tar.gzUnpack libpar 2 and enter its folder
tar -xvf libpar2-0.4.tar.gz && cd libpar2-0.4Compile libpar2. This will take a good 10-15 minutes.
./configure && make && sudo make installGo to nzbget directory
cd ..Compile, install and create the configuration file for nzbget 13.0. This also takes a good 10 minutes.
./configure && make && sudo make install && sudo make install-confChange the permissions of the configuration file
sudo chown pi:root /usr/local/etc/nzbget.confInstall the Videosort post processing script to have NZBGet sort your video media automatically
Enter the NZBGet scripts folder
cd scriptsDownload VideoSort 5.0
sudo wget http://sourceforge.net/projects/nzbget/files/ppscripts/videosort/videosort-ppscript-5.0.zipUnpack the VideoSort Script
unzip videosort-ppscript-5.0.zipNote: Your extension scripts folder is ~/nzbget-13.0/scripts/ which you set in NZBGet Settings -> Paths -> ScripDir
Note: For the Raspberry Pi the extra / is necessary after scripts
Run the nzbget daemon
nzbget -DNow try and access NZBGet at http://ip.address:6789 username:nzbget password:tegbzn6789
Let's make it autostart on the Raspberry Pi using an upstart script on boot
Install upstart
sudo apt-get install upstartEnter Yes, do as I say!
Create the upstart file
sudo nano /etc/init/nzbget.confPaste this code and save the file with Ctrl+X, Press y and then Enter
Note: if you are on Raspbmc remove the setuid and setgid lines (thanks to Raijmond)
#description "NZBGet upstart script"
#author "Ben Vassie"

setuid pi
setgid pi

start on runlevel [2345]
stop on runlevel [016]

respawn

script
exec nzbget -D
end script

pre-stop script
exec nzbget -Q
end script
See if the nzbget service works
sudo service nzbget startIt should say something like
nzbget start/running, process 4422
Reboot to make sure NZBGet starts on boot
sudo rebootIf you plan to use SSL with NZBGet use this cipher RC4-MD5 recommended by hugbug the developer of this fine software.
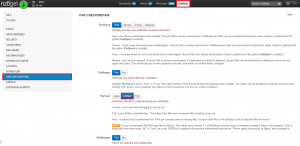
Since the Raspberry Pi is not the strongest machine, I recommend changing Parscan to Limited.
Click Settings then PAR CHECK/REPAIR and make Parscan Limited
Now you are ready to configure NZBGet

