 nZEDb is a fork of the popular newznab indexer. It is becoming increasingly popular because it is actively developed and has a plethora of features. This guide will show you how to get nZEDb up and running on Raspbian (September 9, 2014 release) so you can have your own private usenet indexer.
This guide is derived from the official Ubuntu nZEDb guide but has been adapted for the Raspberry Pi. When you are done you can have an always on indexer monitoring a few binary groups (I have been indexing 10 groups for the past 5 days) and use it with your choice of software: Sonarr (NzbDrone), SickRage, SickBeard, Couchpotato, NZBGet and Sabnzbd. You will get an API key and login and password to use with these software packages.
Updated to include moving the MySQL database
If you are trying to figure out which hardware would work best for you, consider reading the Pi benchmarks.
Usenet Provider UsenetServer Newshosting Frugal Usenetlink
Install nZEDb Raspberry Pi for Personal Usenet Indexing
Install some basic stuff like python and git
sudo apt-get install software-properties-common python-software-properties git -yIf you plan on using this indexer long term you will want to mount some USB storage to store the covers, MySQL database and the nzb files.
Install MySQL
All of your nzbs and releases and stuff will be put into a MySQL database. You will install mysqltuner as well so you can get suggestions about how to tweak the database in the future.
sudo apt-get install mysql-server mysql-client libmysqlclient-dev mysqltuner -yEdit the configuration file
sudo nano /etc/mysql/my.cnfHere is where you can change the path of the database to your external USB storage
Make sure you make the user mysql the owner of the directory to which you relocate
datadir = /var/lib/mysqlMax allowed packet should already be set
max_allowed_packet = 16MAdd this line in the same section max_allowed_packet is
group_concat_max_len = 8192Hit Ctrl+X, Y and then Enter to exit the MySQL configuration
Run MySQL and enter your root password you chose during the MySQL installation
sudo mysql -pGrant your username permission to access the MySQL database
Note: you do not paste the mysql> part for either of these commands.
mysql>GRANT FILE ON *.* TO 'pi'@'localhost';Exit MySQL
mysql>exitInstall phpMyAdmin
This is optional but it is recommended, it gives you a nice interface to access your indexer databases
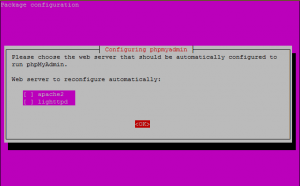
sudo apt-get install phpmyadmin -ySince you are running nginx don't tell it to reconfigure anything and just press Enter.
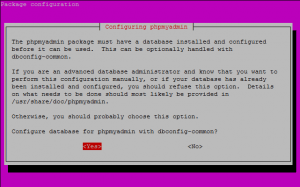
Say ok to dbconfig-common
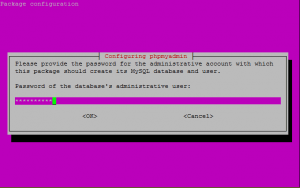
You will need to enter the root password for the MySQL database which you created earlier
I entered the same password I use for MySQL here, this is the same password you will use to log in to phpMyAdmin
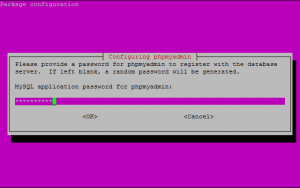
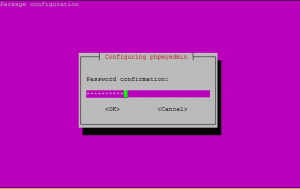
Enter the same password as the previous screen here
Now secure phpMyAdmin with encryption
sudo php5enmod mcryptYou can access phpMyAdmin at http://ip.address/phpmyadmin
Your login details for phpmyadmin should be same as for MySQL
Install nginx
Install nginx Web Server
Install nginx from the repository
sudo apt-get install nginx -yInstall PHP fast page for nginx
sudo apt-get install php5-fpm -yEdit the configuration file
sudo nano /etc/nginx/sites-available/nZEDbPaste this code, change HTPCGuides.com to your local ip address (e.g. 192.168.40.110). You can add multiple server names separated by spaces
server_name 192.168.40.110 HTPCGuides.com;
server {
    # Change these settings to match your machine.
    listen 80 default_server;
    server_name HTPCGuides.com;

    # These are the log locations, you should not have to change these.
    access_log /var/log/nginx/access.log;
    error_log /var/log/nginx/error.log;

    # This is the root web folder for nZEDb, you shouldn't have to change this.
    root /var/www/nZEDb/www/;
    index index.html index.htm index.php;

    # Everything below this should not be changed unless noted.
    location ~* \.(?:ico|css|js|gif|inc|txt|gz|xml|png|jpe?g) {
        expires max;
        add_header Pragma public;
        add_header Cache-Control "public, must-revalidate, proxy-revalidate";
    }

    location / {
        try_files $uri $uri/ @rewrites;
    }

    location ^~ /covers/ {
        # This is where the nZEDb covers folder should be in.
        root /var/www/nZEDb/resources;
    }

    location @rewrites {
        rewrite ^/([^/\.]+)/([^/]+)/([^/]+)/? /index.php?page=$1&id=$2&subpage=$3 last;
        rewrite ^/([^/\.]+)/([^/]+)/?$ /index.php?page=$1&id=$2 last;
        rewrite ^/([^/\.]+)/?$ /index.php?page=$1 last;
    }

    location /admin {
    }

    location /install {
    }

    location ~ \.php$ {
        include /etc/nginx/fastcgi_params;

        # Uncomment the following line and comment the .sock line if you want to use TCP.
        #fastcgi_pass 127.0.0.1:9000;
        fastcgi_pass unix:/var/run/php5-fpm.sock;

        # The next two lines should go in your fastcgi_params
        fastcgi_index index.php;
        fastcgi_param SCRIPT_FILENAME $document_root$fastcgi_script_name;
    }
    location /phpmyadmin {
        root /usr/share/;
        index index.php index.html index.htm;
        location ~ ^/phpmyadmin/(.+\.php)$ {
            try_files $uri =404;
            root /usr/share/;
            fastcgi_pass unix:/var/run/php5-fpm.sock;
            fastcgi_index index.php;
            fastcgi_param SCRIPT_FILENAME $document_root$fastcgi_script_name;
            include /etc/nginx/fastcgi_params;
        }
        location ~* ^/phpmyadmin/(.+\.(jpg|jpeg|gif|css|png|js|ico|html|xml|txt))$ {
            root /usr/share/;
        }
    }
    location /phpMyAdmin {
        rewrite ^/* /phpmyadmin last;
    }
}
Create the nginx log files
sudo mkdir -p /var/log/nginxMake the log file writeable
sudo chmod 755 /var/log/nginxDisable the default nginx site
sudo unlink /etc/nginx/sites-enabled/defaultMake nZEDb the default site for nginx
sudo ln -s /etc/nginx/sites-available/nZEDb /etc/nginx/sites-enabled/nZEDbRestart php5-fpm
sudo service php5-fpm restartRestart nginx
sudo service nginx restartAdd the pi user to the www-data group
sudo usermod -aG www-data piInstall PHP
nZEDb now requires at least php 5.5 to function. If you are on wheezy you have to add the jessie repository. If you are on jessie skip down to installing the PHP goodness.
echo "deb http://mirrordirector.raspbian.org/raspbian/ jessie main contrib non-free rpi" | sudo tee -a /etc/apt/sources.listUpdate repositories to include jessie
sudo apt-get updateCreate a preferences file for the jessie repository to control it
sudo nano /etc/apt/preferences.d/jessie.prefPaste these settings, -1 means it will only install from jessie when we use the -t switch in apt-get install
Package: *
Pin: release n=jessie
Pin-Priority: -1
Ctrl+X, Y and Enter to Save
Now you can install all the PHP goodness forcing Raspbian to install it from jessie.
Note: this installs a lot of libraries from Jessie which can cause conflicts when installing other software. I therefore recommend using the Raspberry Pi as an indexer be the sole job of that particular Raspberry Pi.
sudo apt-get install -t jessie php5 php5-cli php5-gd php-pear php5-mysql php5-curl php5-dev -yFor some reason php5 includes Apache so you will have to remove Apache2
sudo apt-get purge apache* -y
sudo apt-get remove apache* -y
sudo apt-get autoremove -y
Edit the main php file
sudo nano /etc/php5/cli/php.iniChange the following settings:
The default execution time is 30 seconds, change it to 120 seconds
max_execution_time = 120The Raspberry Pi has a small amount of memory, I am using the B+ version which has 512MB so I will limit the memory to 300MB. You are welcome to leave it at -1 so it uses maximum memory.
The 300M is not a typo, if you put in 300MB in either php ini file you will get an out of memory error when trying to run the scripts
memory_limit = 300MChange your timezone from a list of timezones here. Remove the preceding ;
date.timezone = YourLocalTimezoneEnable error logging (Needed when reporting bugs) should be already set
error_reporting = E_ALLlog errors, should also be set to on
log_errors = OnAdd this line under log_errors so you have a log file location
error_log = php-errors.logClose and save this file.
Make the same changes in nginx php file
For log_errors you will need to add the lines shown above to the php.ini file, for nginx edit this php file
sudo nano /etc/php5/fpm/php.iniCtrl+X, Y and then Enter
Install php_yenc_decode
PHP decode is used to decode the yenc posts on usenet, it is the fastest and most efficient. If you are on Raspbian Jessie install this first
sudo apt-get install libboost-regex1.55-dev -yThen install php_yenc_decode
cd ~/
git clone https://github.com/kevinlekiller/simple_php_yenc_decode
cd simple_php_yenc_decode/
sh ubuntu.sh
cd ..
rm -rf simple_php_yenc_decode/
Install Memcached
This is only necessary if you are sharing with other users, if you will be the only one using it there is no point
Grab memcache to enable caching for php
sudo apt-get install memcached php5-memcached -yYou will enable this later in the Finishing up section
Install nZEDb
Git clone the latest nZEDb
sudo git clone https://github.com/nZEDb/nZEDb.git /var/www/nZEDbChange ownership of the nZEDb installation to pi
sudo chown -R pi:www-data /var/www/nZEDbChange permissions so nZEDb can put covers places, unpack rar files and execute stuff in general
Note: if you are using an external USB the covers and resources paths you may have them setup differently.
sudo chmod 777 /var/www/nZEDb/libs/smarty/templates_c
sudo chmod -R 777 /var/www/nZEDb/resources/covers/
sudo chmod -R 777 /var/www/nZEDb/www/
sudo chmod -R 777 /var/www/nZEDb/resources/nzb/
sudo chmod -R 777 /var/www/nZEDb/resources/tmp/unrar/
sudo chmod 777 /var/lib/php5
sudo chmod 777 /var/lib/php5/sessions
Restart or you might get some preflight errors during the initial setup
I got php-json not supported Error and several Warnings , restarting made them disappear.
Restart nginx
sudo service nginx restartRestart php-fpm
sudo service php5-fpm restartInstall unrar if you want to check for passworded releases
sudo apt-get install build-essential -y
cd /tmp
RARVERSION=$(wget -q http://www.rarlab.com/rar_add.htm -O - | grep unrarsrc | awk -F "[\"]" ' NR==1 {print $2}')
wget $RARVERSION
tar -xvf unrarsrc*.tar.gz
cd unrar
sudo make -j$(nproc) -f makefile
sudo install -v -m755 unrar /usr/bin
cd ..
rm -R unrar*
rm unrarsrc-*.tar.gz
The latest unrar is now installed
nZEDb Initial Setup Configuration
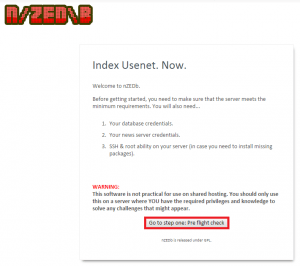
Point your browser to the box http://ip.address/install to start the Installation setup.
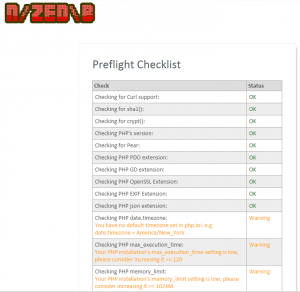
Time to do a pre-flight check
Everything should be fine, the warnings will usually disappear if you restart the webserver
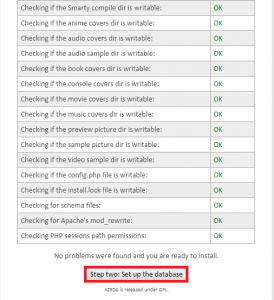
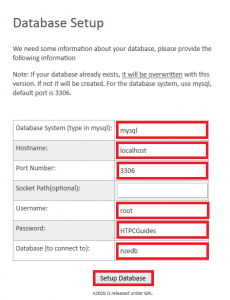
Scroll down and click Set up the database
Database system is mysql
Hostname is localhost or 127.0.0.1
Port is 3306
Username is root
password is the MySQL password you chose during the MySQL installation
Database to connect to is nzedb
Click Setup Database
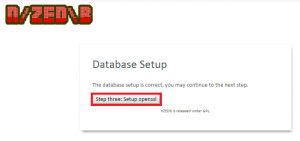
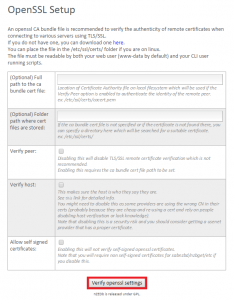
On to OpenSSL
Since this is a personal indexer we will skip over OpenSSL. Click Verify OpenSSL
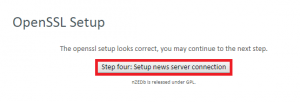
It will say success, now it's usenet provider time. I use UsenetServer because they support compressed headers.
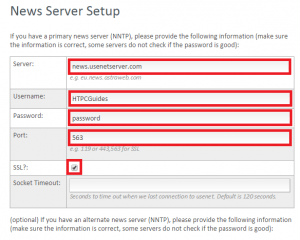
Click Setup news server connection
Enter your usenet provider server address, username and password.
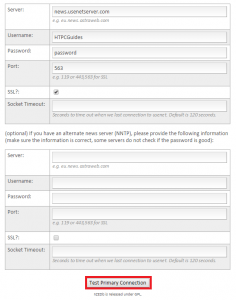
Set the port to 563 or 443 if you are using SSL. Check off SSL.
Scroll down and click Test primary connection
Click Save Settings
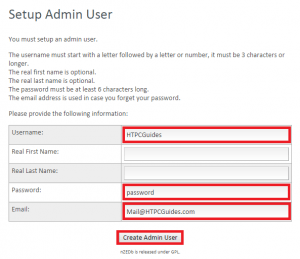
Now it's time to set up an Admin. Enter a username and password, you also need an email address.
Click Create Admin User
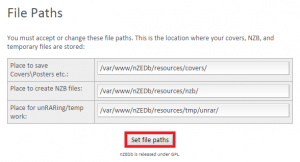
Click Set file paths
If you are using an external USB storage for the covers and nzbs, set the paths here otherwise leave them as they are and click Set file paths
You succeeded! click admin home page to go to the administration page
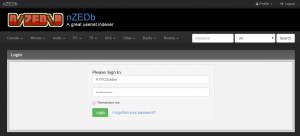
You should see this login screen, enter the admin username and password you just created
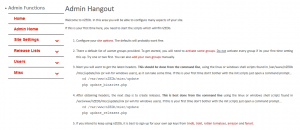
Here is the admin page 🙂
Updating your Indexer
It is best to do a test to make sure the indexing scripts work correctly
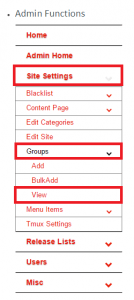
In your admin page, click Settings -> Group and choose View
Enter teevee in the search field and click Go
In the Active column, click Activate, leave Backfill Deactivated for now
Back in Terminal, enter the scripts folder
cd /var/www/nZEDb/misc/update/Run the script to download headers from the usenet group you enabled
php update_binaries.phpIf everything looked normal, you can process the headers. This creates releases and nzb files from the headers you just downloaded
php update_releases.php 1 trueYou can now go browse your TV category by clicking TV then All TV in your indexer's web interface, you should see some releases added in list view.
If it's all working, let's automate the process using Screen so you don't have to keep running these scripts manually.
First change these Site Settings
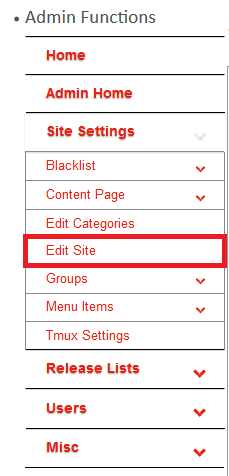
In the Admin page, click Site Settings -> Edit Site
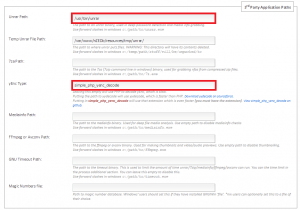
Scroll down to 3rd Party Application Paths
Make the unrar path /usr/bin/unrar
Make yEnc type simple_php_yenc_decode
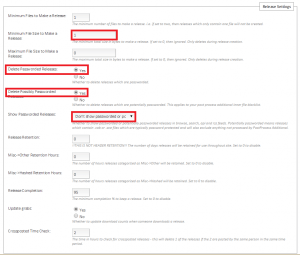
Scroll down to Release Settings
Change Minimum File Size to Make a release to 1
Change Delete Passworded and Delete Possibly Passworded Releases to Yes
Change Show Passworded releases to Don't show passworded or possibly passworded
If you don't plan on setting the predb to decrypt hashes then set Misc->Hashed Retention Hours to 1 and it will discard the releases after one hour
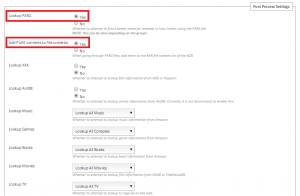
Scroll down to Post Process Settings
Change Lookup Par2 to yes
Change Add PAR2 contents to file contents to Yes
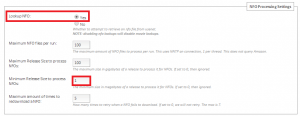
Scroll down to NFO Processing Settings
Change Lookup NFO to Yes
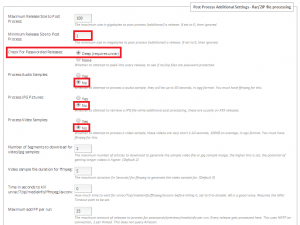
Scroll down to Post Process Additional Settings
If you want to ignore very tiny files (warning this may ignore books) change your Minimum Release Size to Post Process to 1
Set Check for Passworded Releasees to Deep (requires unrar)
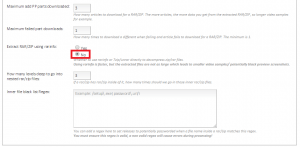
Scroll down a bit further but remain in the same section
Set Extract RAR/ZIP using rarinfo to No
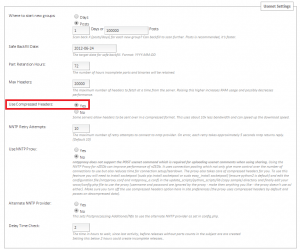
Scroll down to Usenet Settings
Change Use Compressed Headers to Yes
Scroll down to the bottom and click Save
Screen Script Method
This will automate the updating of releases and post processing
Install screen
sudo apt-get install screen -yGo into the scripts folder
cd /var/www/nZEDb/misc/update/nix/screen/sequentialScreen is used to keep the shell running even after you have detached and exited from your SSH session
screen sh simple.shTo detach the screen so it continues running in its shell, press Ctrl+A, let go, then press D
To reattach the screen list the screen session
screen -rFrom here you can kill the script with Ctrl+C
You can also detach again using Ctrl+A, release and press D
Finishing touches
Enable Memcache
sudo nano /var/www/nZEDb/www/config.phpAdd these lines at the bottom of the config file
// Enable memcache
define('MEMCACHE_ENABLED', 'TRUE');
Tuning MySQL
You installed mysqltuner which can give suggestions about how to optimize your database
It is best to run this after the indexer has been running for a few days
Run it using this command.
mysqltunerYou will get some suggestions and you can search how to implement them
Usually it will involve editing the mysql.conf file
Make sure you stop running your scripts first or they will freeze
sudo nano /etc/mysql/my.cnfTo save and exit the mysql configuration hit Ctrl+X, press Y and then enter
Restart MySQL for the configuration changes you made to take effect
sudo service mysql restartStart your scripts again
Reinstall nZEDb
You may make some mistakes or want to start over with your nZEDb indexer, this is how I did it.
Change username to your username you use to log on with
sudo service apache2 stop
sudo service nginx stop
sudo rm -r /var/www/nZEDb/
cd /var/www/nZEDb
sudo git clone https://github.com/nZEDb/nZEDb.git /var/www/nZEDb
sudo chown pi:www-data /var/www/nZEDb
My nZEDb configuration guide should follow in the future, but this initial setup should get you indexing a few groups for personal usage.
Move the SQL Database
It is a good idea to move your nZEDb Mysql database
I will assume you have mounted a USB drive properly
Stop MySQL and Nginx temporarily
sudo service mysql stop
sudo service nginx stop
Make a MySQL directory on your USB or SATA drive and change the owner to mysql
mkdir -p /mnt/usbstorage/mysql
sudo chown -R mysql:mysql /mnt/usbstorage/mysql
Copy the database over
cp -r /var/lib/mysql/ /mnt/usbstorage/mysqlChange the MySQL configuration
sudo nano /etc/mysql/my.cnfFind this line and adjust it to your USB storage path's mysql folder
datadir = /var/lib/mysqlCtrl+X, Y and Enter
Restart MySQL and nginx
sudo service mysql restart
sudo service nginx restart
