 VMPlayer is a great alternative to VirtualBox to test out new software. Virtual Machines are your digital playground for evaluating new software to avoid messing with your production environment (likely your home media server) and breaking something. In the last post I showed you how easy it is to install Ubuntu in a virtual machine using VMPlayer on Windows. Now I will show you how to pimp your virtual machine to make your life super convenient. After installing VMWare tools you will be able to drag and drop files between your host and virtual machine, map shared folders for your virtual machine to use and share your clipboards. All of these features (many of which were unreliable for me using Virtualbox) make virtual machine testing much easier.
Install Ubuntu VMware tools on VMPlayer
Run your Ubuntu virtual machine from VMPlayer or VMWorkstation.
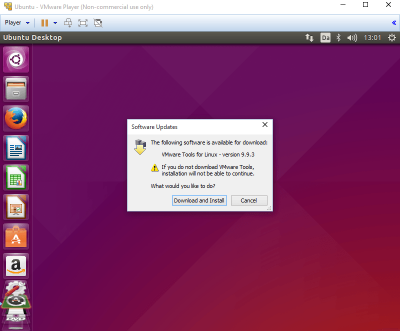
Usually you will be prompted to install VMware Tools for Linux so click Download and Install
If you don't see the dialog box Click Player menu then Manage and choose Install VMware Tools
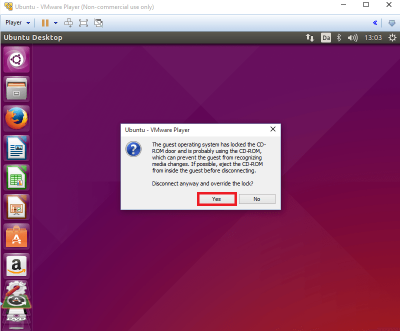
You will see a message about the CD drive being locked, override it by saying Yes
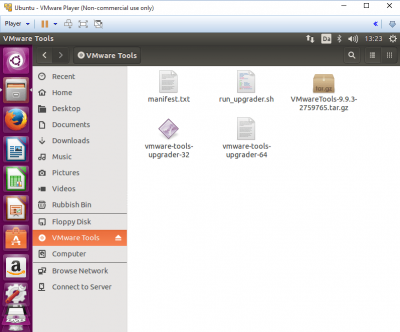
Your file manager will autopop up. Click the VMware tools cd that has been mounted, find the VMwareTools-x.x.x.tar.gz file with the box icon.
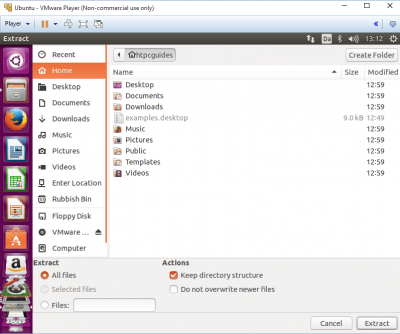
Right click the box icon (VMwareTools-x.x.x) and choose Extract to
Select your Home folder in the left pane and click Extract
Time to run the terminal for entering commands.
Click the Ubuntu Unity Button in the top left corner of your Ubuntu virtual environment
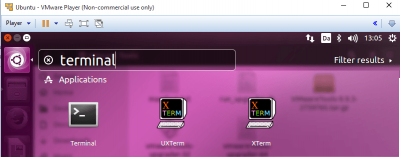
A search area will pop up, type terminal and then click Terminal to start the terminal session.
Fresh Terminal sessions start in your home directory which is where we unpacked VMWare tools.
Enter the following commands in the terminal to finish installing the VMWare tools
Enter the vmware tools directory we have just unpacked
cd vmware-tools-distribRun the VMware tools perl installer with sudo (administrative) powers and accept the defaults with the -d switch
sudo perl vmware-install.plYou will see a bunch of output, when it's done you need to reboot which you can do with this command
sudo rebootNow you have the VMware tools you can easily copy and paste text between your host machine and virtual test environment
You can also drag and drop files between your virtual machine and host machine
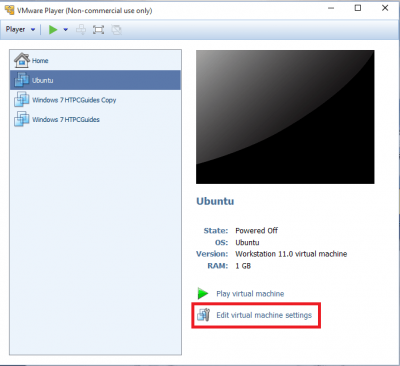
Enable Shared Folders in VMPlayer
The other benefit of the VMware tools is sharing a directory/folder on your host machine with your virtual machine so you can read and write to it as if it were a local folder.
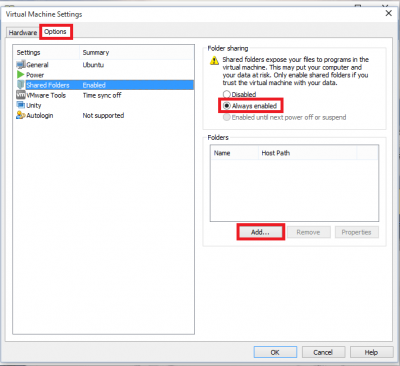
Click Options tab
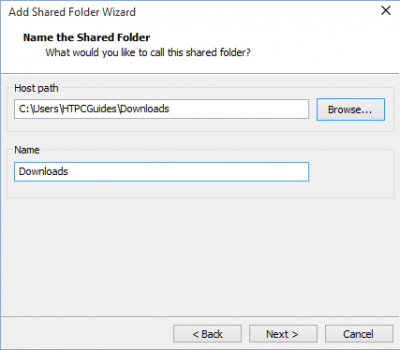
Choose a name for the share and Browse to the folder on your host machine that you want to share
Click Next
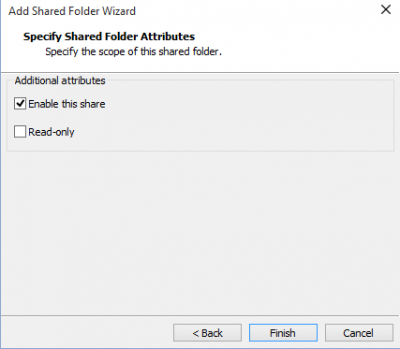
Choose the permissions, if you only want to be able to read from it you can do that.
Click Finish
You can repeat the process to create multiple shared folders, some can be read access while others can have read and write access. Do think about the permissions so that your virtual machine doesn't unwittingly destroy important data on your host machine.
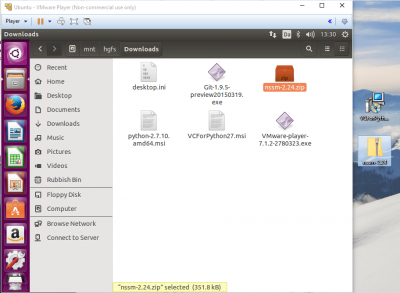
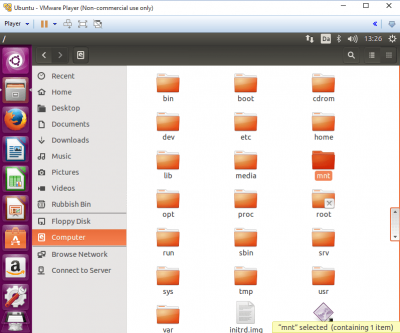
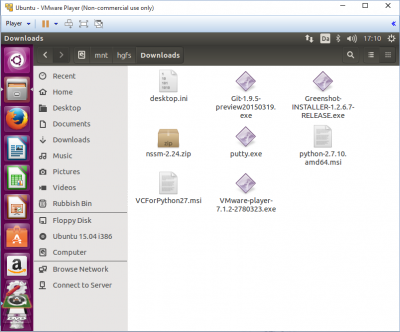
After you are done you can find your host machine's folder by browsing in the virtual machine's File manager by clicking Computer and then going into the mnt folder
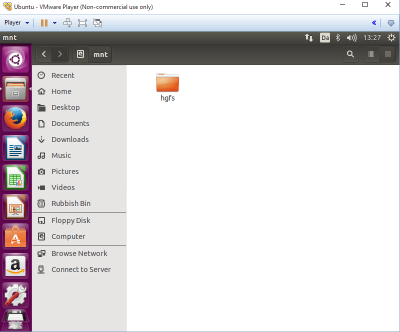
You will see an hgfs folder, inside here is the folder you shared
Now you can see the contents, very convenient for sharing files between your virtual test environment and host environment
Now clone your Ubuntu virtual machine (or any operating system) so you can keep your fully prepped image with VMware tools, mapped shared folders and other software nice and clean – instead you will use an exact copy of the virtual machine to play around on.

