Install NZBGet
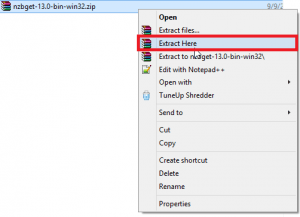
There is no windows installer for nzbget so you need to download the latest stable zip. I use Winrar to unpack the zip but Windows has a built-in unzipper too.
Copy the file to the location which you want to install it like C:\Program Files (x86)\ since you will be unpacking it to its own folder.
Right click on the nzbget zip you downloaded and extract the files.
Now you have a folder with nzbget inside
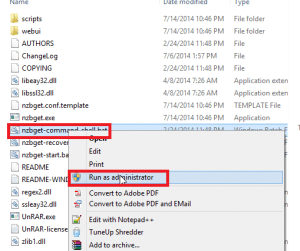
Go inside and locate nzbget-command-shell.bat. Right click and choose Run as adminsitrator.
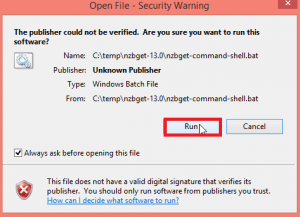
You will get a prompt if you are sure you want to run the program, click Run
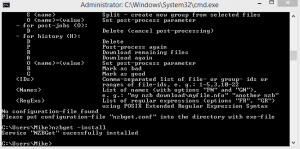
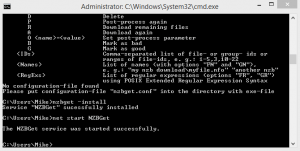
At the command prompt. Type nzbget -install
Now start the nzbget service, type net start NZBGet
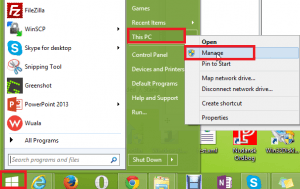
Click your start menu, find Computer (Windows 7) or This PC (Windows 8).
Right click on This PC or Computer and click Manage.
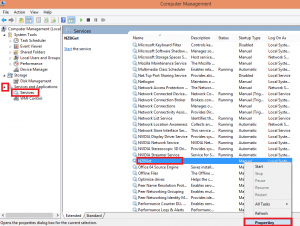
On the left hand side click Services and Applications. Click Services.
Scroll down and find NZBGet in the right pane. Right click and select Properties.
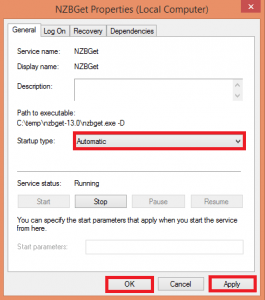
NZBGet currently starts manually, we want it to autostart.
Choose Automatic from the Startup type dropdown. Click Apply and then OK.
Now you are all set to configure nzbget.
Configure NZBGet
http://ip.address:6789, username: nzbget, password: tegbzn6789
You will be met with this screen. Click settings
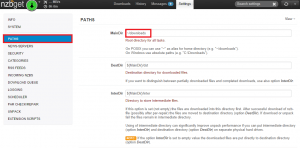
Now click PATHS, change your downloads directory if necessary
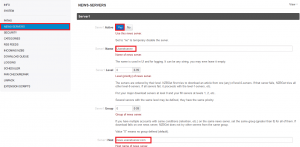
Now click NEWS-SERVERS. Make sure Server 1 is enabled and give your server a name like Usenetserver.
Enter your usenet provider's server address like news.usenetserver.com
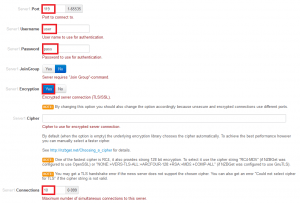
Scroll down until port is at the top. Enter port 563, your username and password.
Enable Encryption, enter 10 connections or whatever your provider's maximum amount is
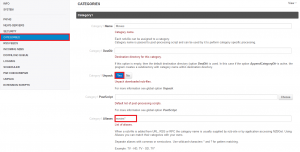
Now click CATEGORIES
Category 1 by default is movies, make sure Unpack is enabled. Add the Alias movies*
Adding aliases is useful when you get nzbs through private indexers then NZBGet can use the metadata to group the release in the appropriate category.
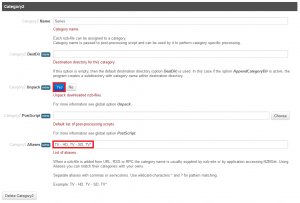
Scroll down until you see Category 2 which is for TV
Leave Series as the name or change it to TV, do remember if you do this as you may need the category name for nzbdrone.
Make sure unpack is enabled. Add TV - HD, TV - SD, TV* as the Alias
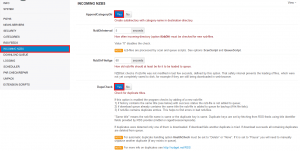
Click INCOMING NZBS
Make sure AppendCategoryDir is enabled to work with the categories we configured earlier.
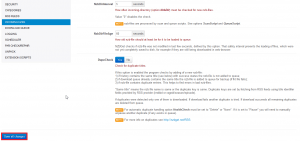
Leave DupeCheck on, which will avoid downloading the same nzb file twice
Scroll down until you see Save Changes in the bottom left corner and click it.
You will see that your configuration has been saved successfully. Click Reload NZBGet.

